
Add a guest
Create a guest profile with contact details, preferences, and marketing choices.
Most guests create themselves the first time they book. Add one by hand when you want the profile ready first: a VIP a partner referred, a regular from your old system, or a private-dining contact. The New Guest window takes three steps: identity, details, review.
Open the New Guest window
On the Guests page, click Add guest at the top right. The window opens on step 1, Identity.
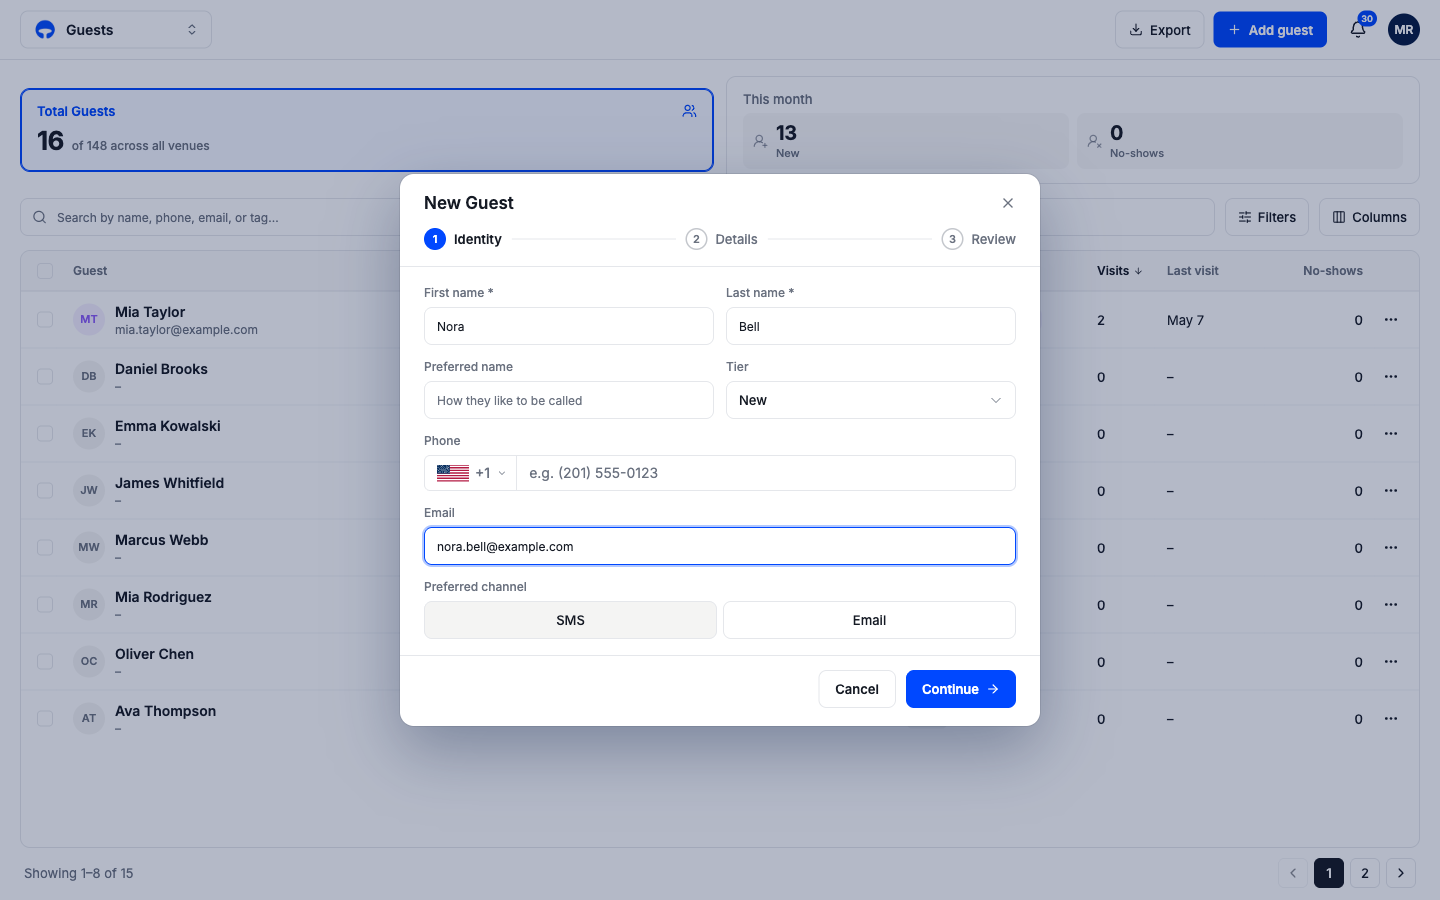
Enter who they are
First and last name are required; everything else can wait. Add their phone or email now if you have it, since that is what links their future bookings to this profile. Preferred channel sets whether Covers texts or emails them, and Tier starts them at New unless you already know they belong higher.
Click Continue.
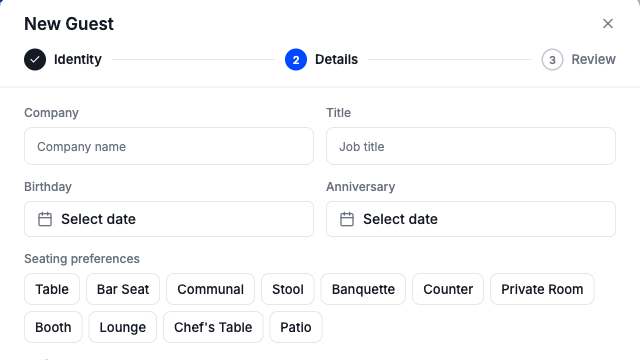
Add details worth remembering
Everything on step 2 is optional: birthday, anniversary, company and job title, seating preferences like Booth or Chef's Table, a preferred server, tags, and an opening note. Fill in what you know and skip the rest; every field can be edited later from the profile.
Click Continue.
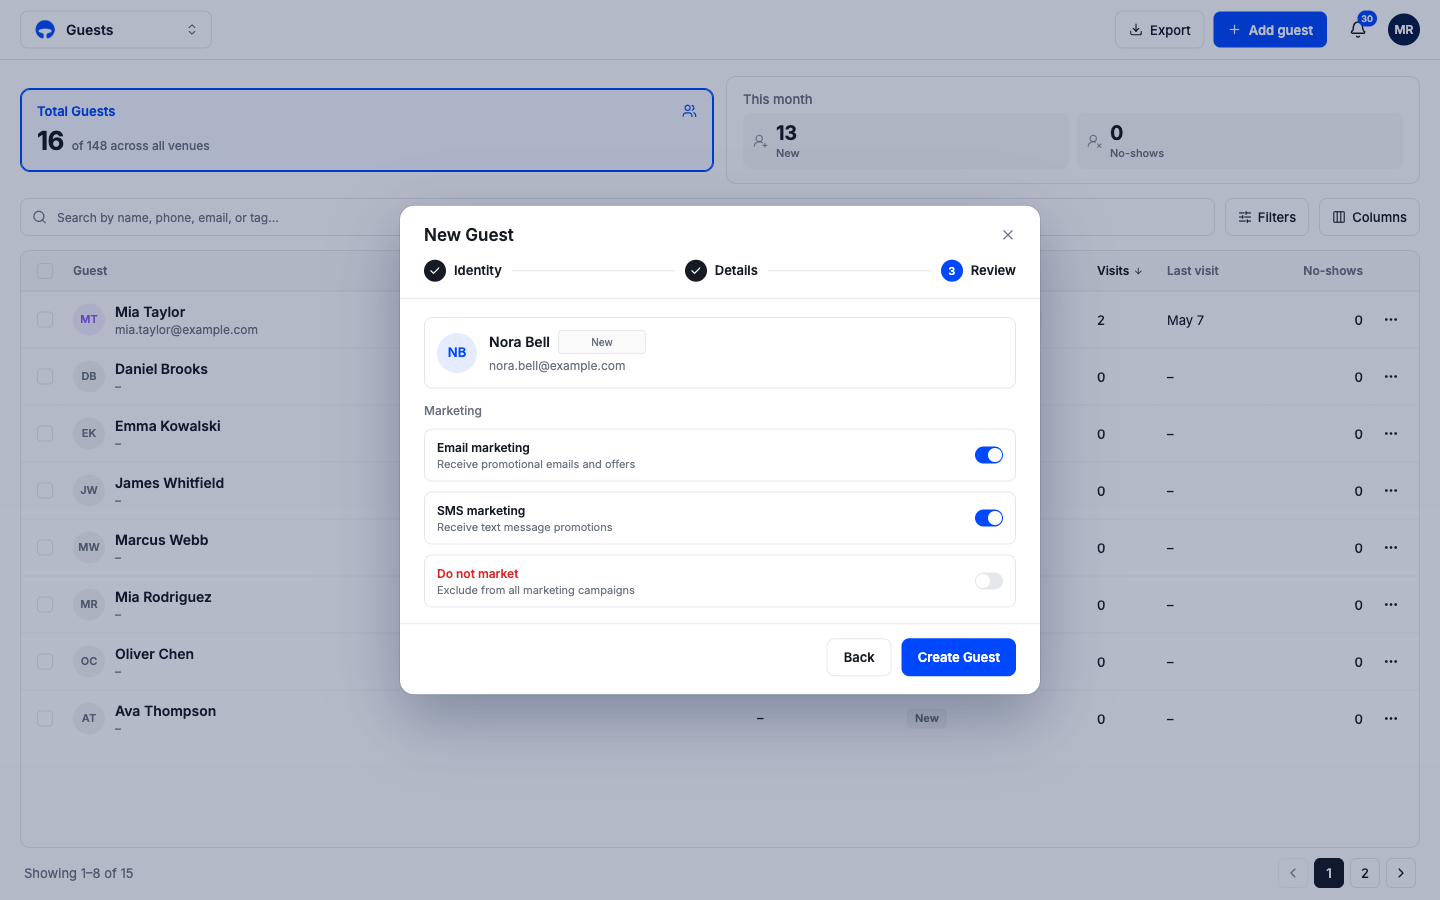
Review and set marketing choices
Step 3 shows the profile summary and the guest's marketing switches: Email marketing, SMS marketing, and Do not market, which excludes them from every campaign. Set them to match what the guest agreed to, then click Create Guest. The new profile appears in the directory.