

Quickstart
Set up your venue and take your first booking.
This guide takes your venue from a fresh Covers account to a live booking page. Covers tracks the whole setup on one checklist, so you always know what is done and what is left. Until you go live, your booking page and guest texts stay off; you can work through the steps at your own pace.
Before you start
You'll need your Covers sign-in details. If your venue hasn't been created yet, the person who runs your Covers account can send you an invite from Settings, under Team & Roles.
Work through the setup checklist
Open the Go live checklist
Open the menu at the top left, choose Settings, then click Go live. Covers pins it to the top of the settings list, with an amber dot, until your venue is live. The same steps also follow you around the dashboard as a small Finish setup panel, so you can pick up where you left off from any page.
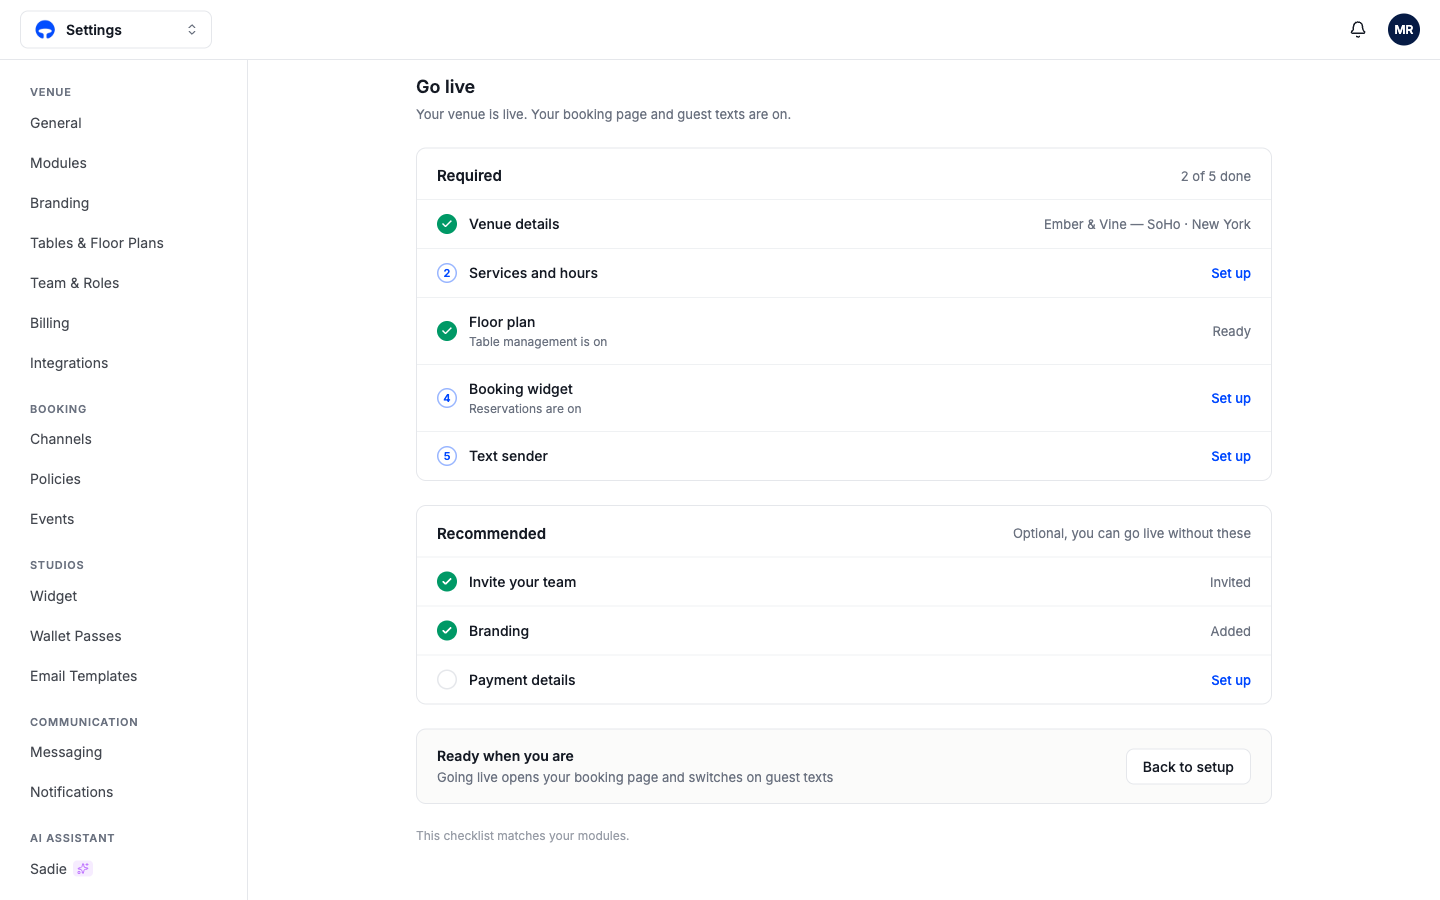
Check your venue details
Click Set up next to Venue details. Confirm your venue name, address, and phone number; guests see these on your booking page and in confirmation texts. The URL slug on this page sets the web address of your booking page, and your timezone is detected from the address.
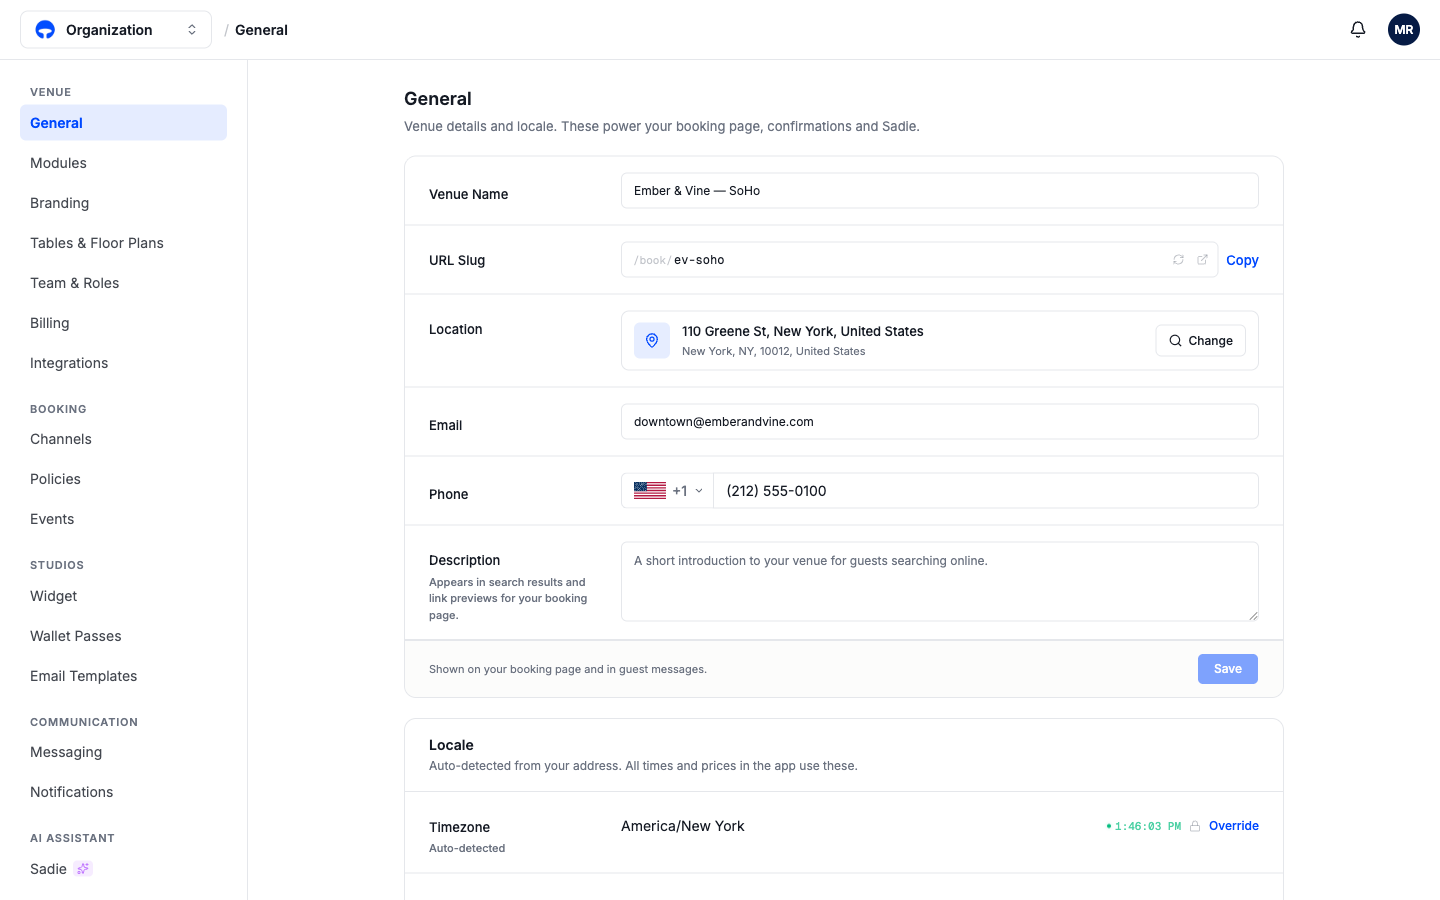
Create your services
A service is a bookable period with its own hours and capacity, like Lunch or Dinner. Guests can only book times inside a service, so create one for each period you take bookings. Follow Create a service; once your first service is scheduled, the checklist ticks this step.
Build your floor plan
Add your rooms and tables so Covers knows what it can seat and can offer guests the right table sizes. Follow Build your floor plan. This step appears only when Table management is switched on for your venue.
Set up your booking widget
The booking widget is the page guests use to book online. Click Set up next to Booking widget to open it, check the preview looks right, and copy your booking link; grabbing the link ticks the step. To put the widget on your own website, follow Put bookings on your website.
Choose your text sender
The text sender is the phone number your confirmations, reminders, and table-ready texts come from. Click Set up next to Text sender to open Messaging settings and pick your number.
Go live
Back on the Go live page, click Go live at the bottom once the required steps are done. Covers confirms with "You're live. Your booking page is open." From that moment guests can book, and confirmation texts go out.
Find your way around Covers
Everything lives under the menu at the top left of the screen. Operate holds the day-to-day pages: Service View, Reservations, Events, Venue Availability, and Floor Plan. Guests holds your guest book and the message inbox. Grow holds Analytics, with Experiences coming soon. Below the groups sit Mise, your AI assistant, and Settings; the bar at the bottom switches between venues.
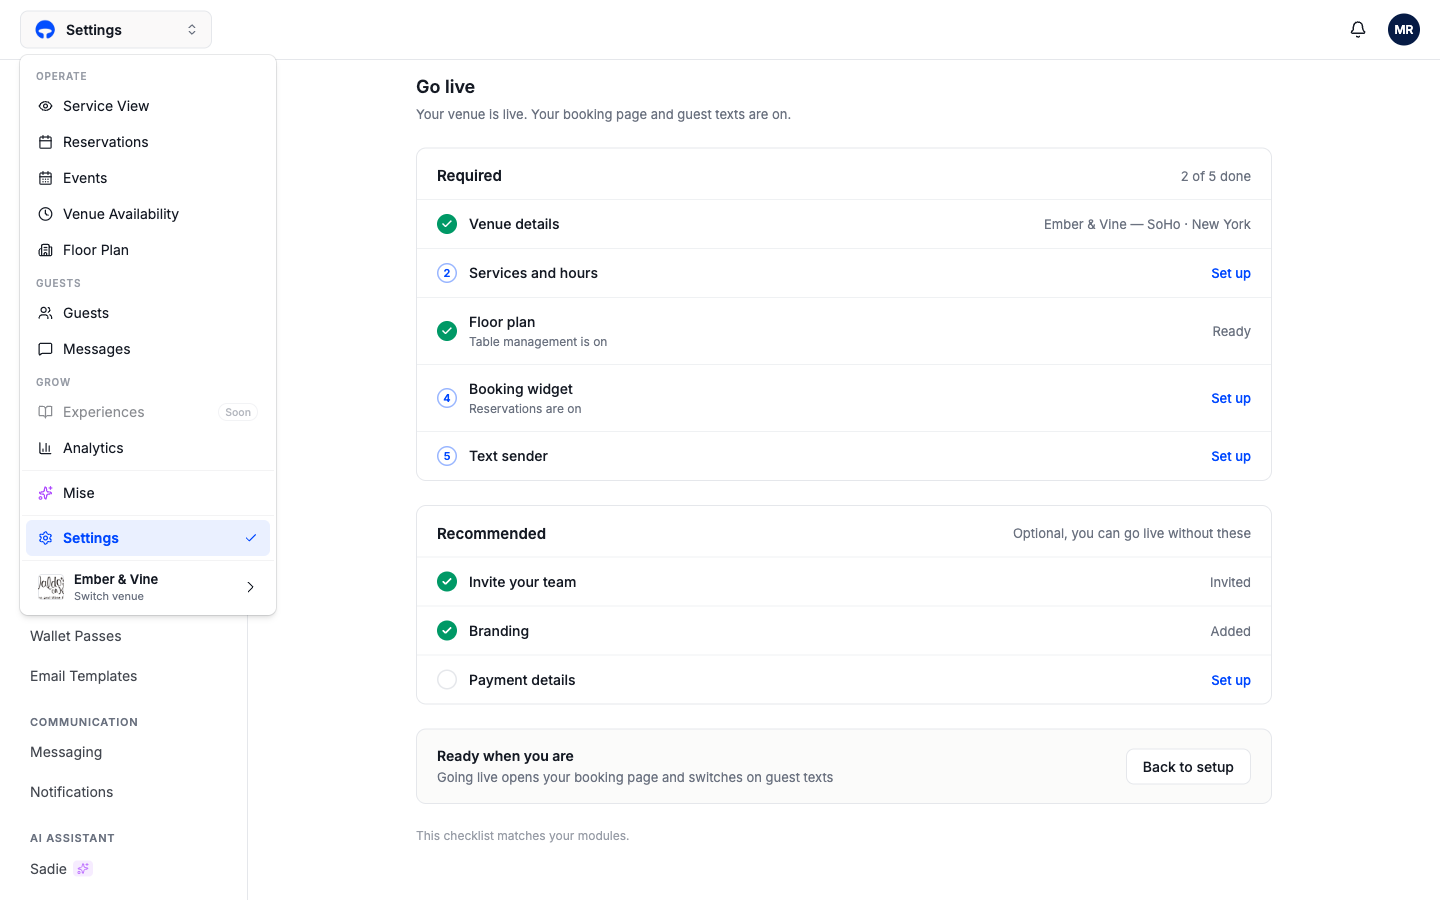
Using Covers on your device
Covers works well on iPad at the host stand. Create actions live in the floating plus button at the bottom of the screen, and forms rise from the bottom so the keyboard never covers them.
The computer gives you the full dashboard, including the studios for your widget, emails, and wallet passes. Press ⌘K anywhere to ask Mise, the built-in assistant, for anything.
The Covers app for iPhone and Android gives you the service view, bookings, guests, and messages from anywhere. The dashboard also works in your phone's browser.