

Build your floor plan
Add zones, tables, and objects until the plan matches your room.
Building a floor plan takes three passes: draw the zones, place the tables, then add the fixtures like walls and doors that make the plan readable. A small room takes about ten minutes. Everything stays on your screen until you click Save Layout, so you can experiment freely.
Before you start
Open Floor Plan from the main menu and make sure Edit layout is selected at the top left. On an iPad or phone, the add buttons live in the floating plus button at the bottom of the screen.
Add your zones
Click Add Zone
A panel opens with zone presets: Section, Bar, Outdoor, Room, Station, and Subsection. Each preset fills in a name and a color you can change later.
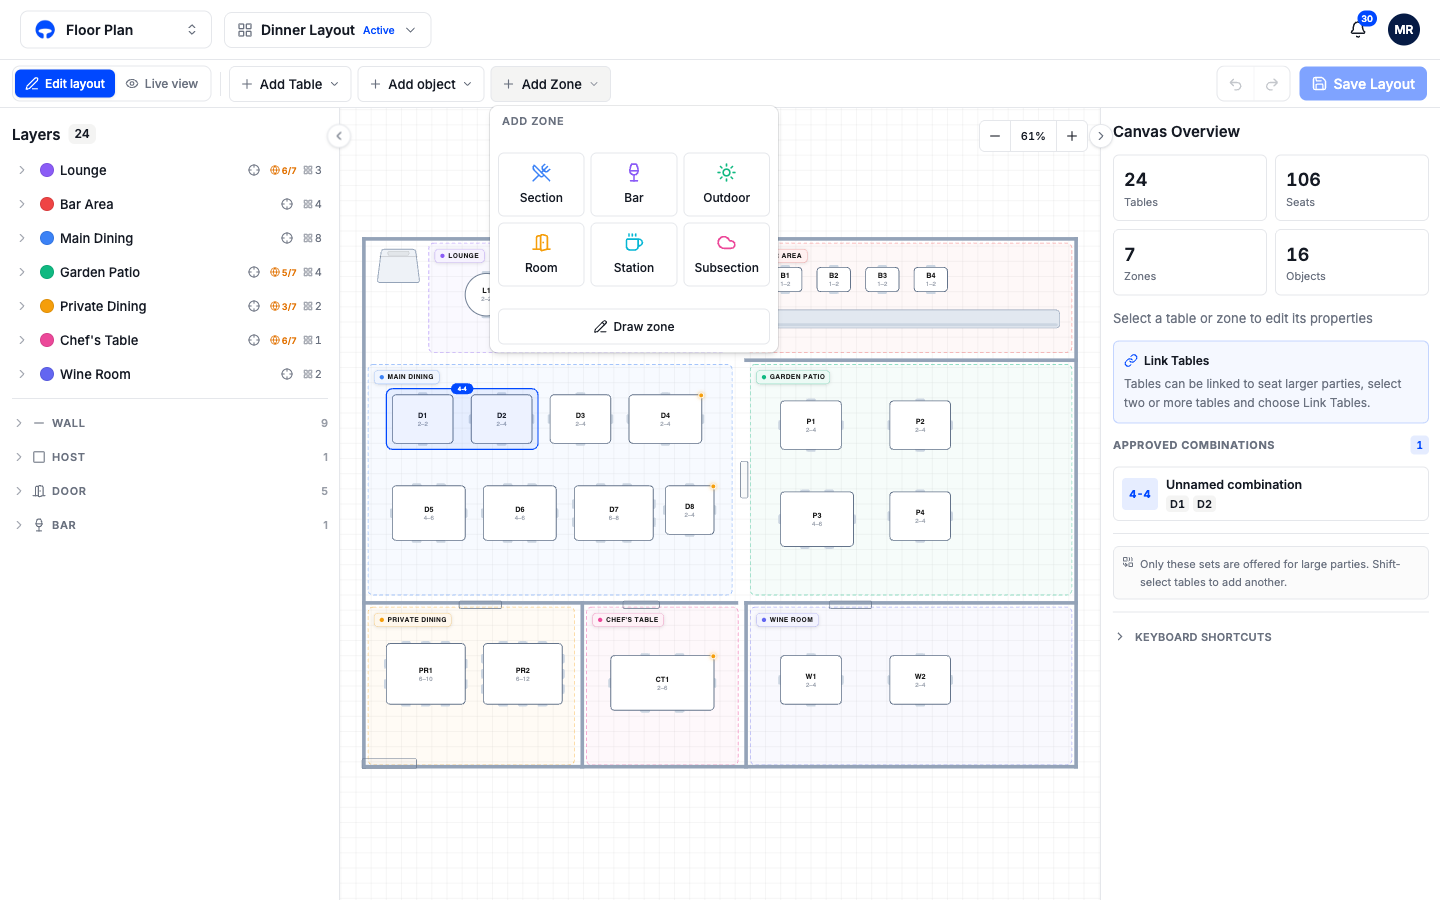
Pick a preset
The zone lands on the canvas as a colored rectangle. Drag it into position and pull the corner handles until it covers the right part of the room.
Rename the zone
Double-click the zone's name in the Layers panel and type your own, like Garden Patio or Main Dining. The color swatch next to the name changes the zone's color.
Zones matter beyond looks: a table belongs to whichever zone it sits inside, tables inherit the zone's booking channels, and guests booking online can be offered a seating area. If your room has an odd shape, choose Draw zone at the bottom of the panel instead of a preset and trace the outline point by point.
Add your tables
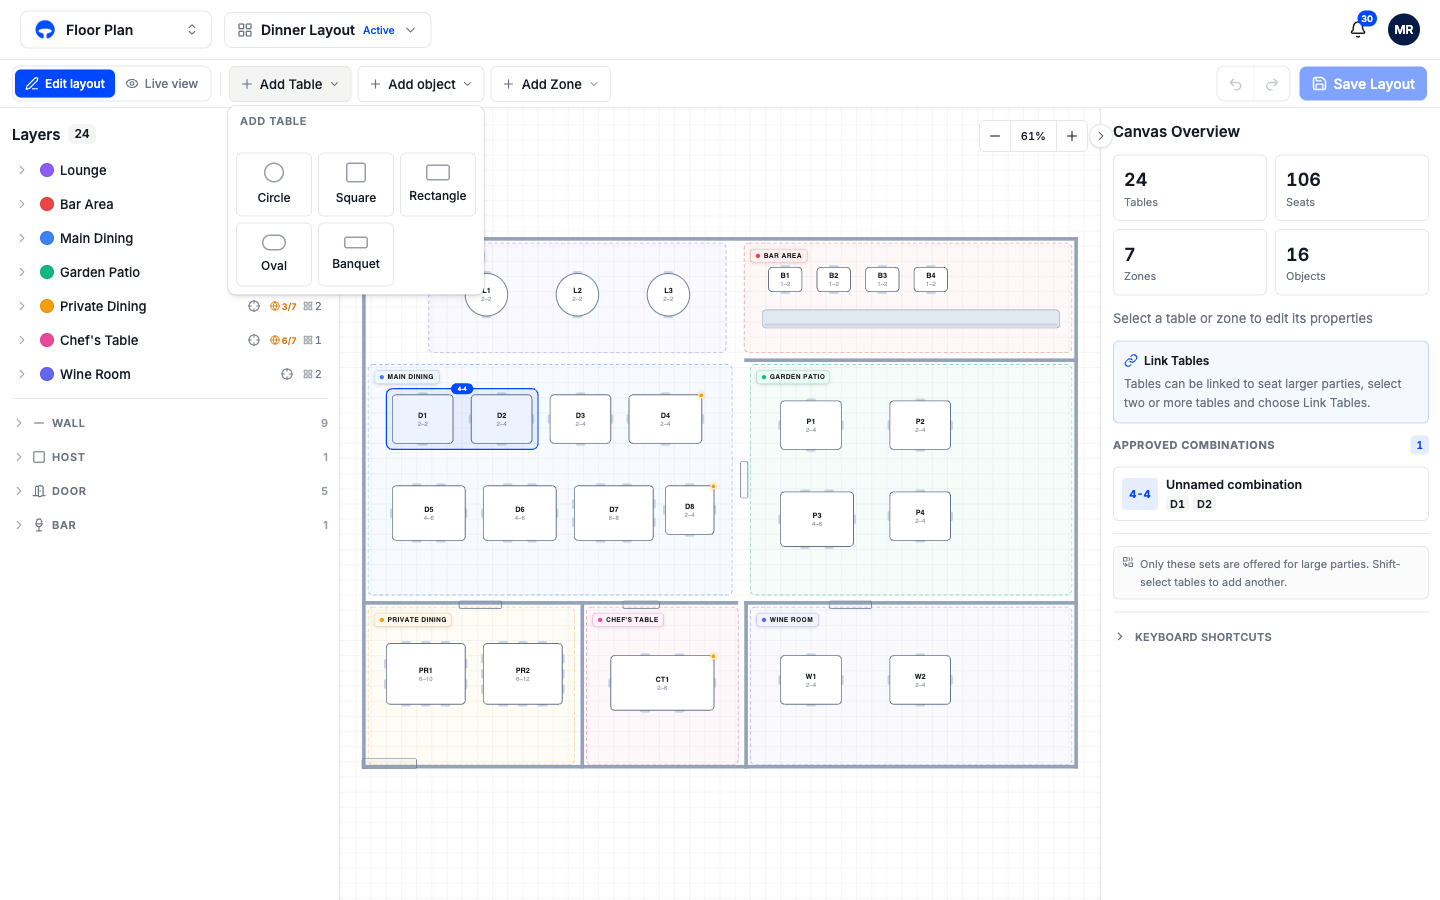
Pick a shape
The table appears on the canvas in a free spot. Drag it where it belongs; it snaps to the grid and joins whichever zone you drop it in.
Set the code and seats
With the table selected, the Properties panel on the right shows its code, its name, and its minimum and maximum seats. The code is the short label hosts see on the floor, like D5 or B2. Every setting is covered in Table settings.
Duplicate a finished table
Select a finished table and press Cmd+D (Ctrl+D on Windows) to place a copy with the same shape and seats. A row of identical four-tops takes seconds this way.
Add walls and doors
Click Add object for the non-bookable parts of the room: Wall, Door, Divider, Bar, Host, Stage, Plant, Kitchen, Bathroom, and TV. Guests cannot book an object; it exists so the plan matches the physical room and hosts can orient themselves.
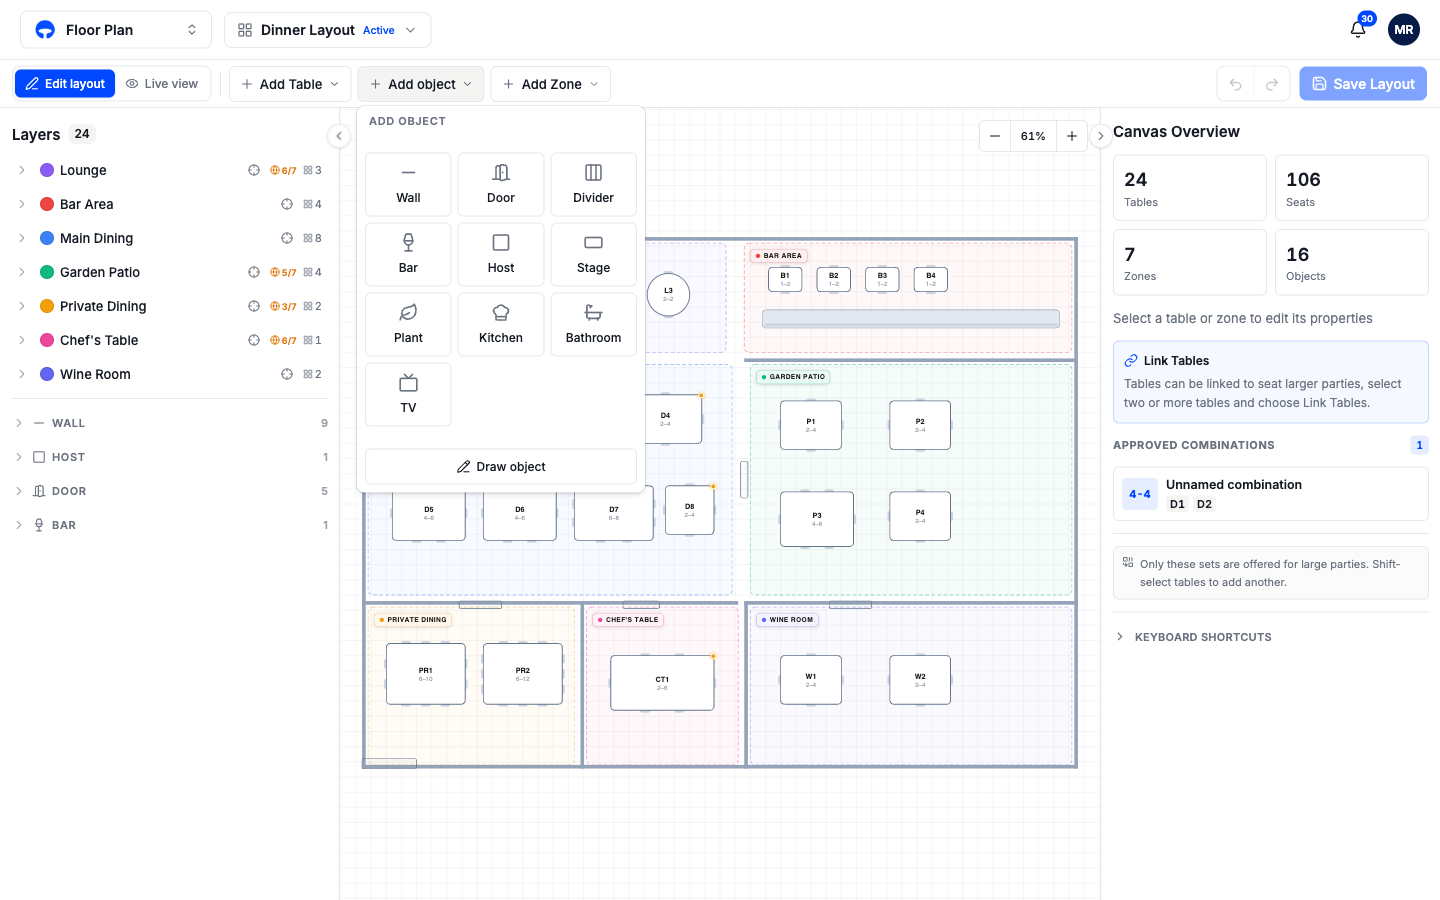
Draw a custom shape
For anything the presets do not cover, both the Add object and Add Zone panels end with a Draw option. Click it and the canvas switches to drawing mode: each click places a point, double-clicking or clicking your first point again closes the shape, and Esc cancels.
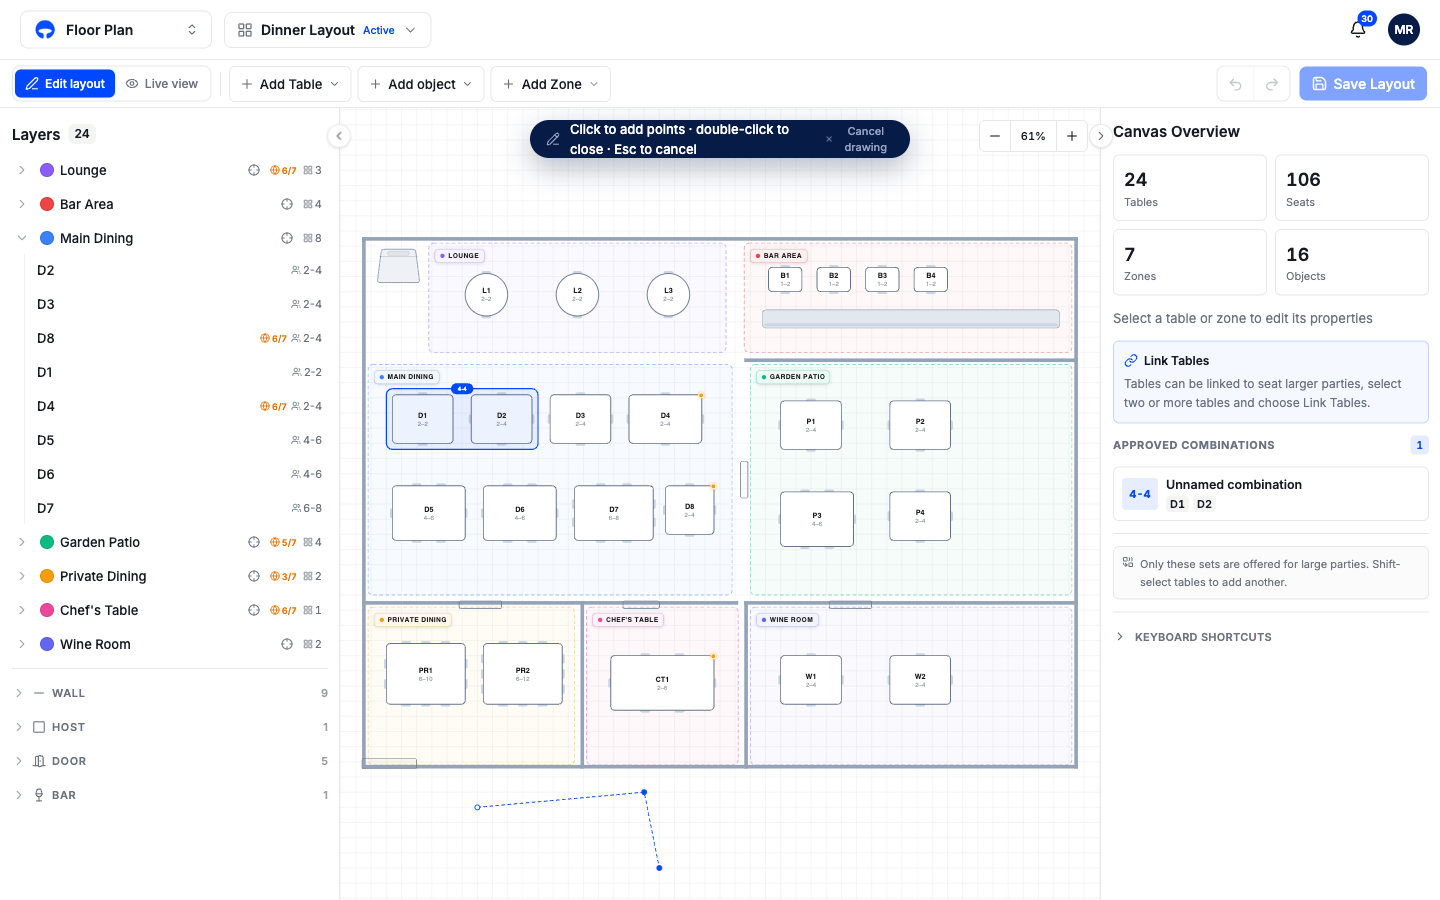
Save the layout
Click Save Layout at the top right. The button only lights up when something changed, and the Unsaved changes chip next to it disappears once the save lands. From that moment the new plan is what the booking engine seats against.